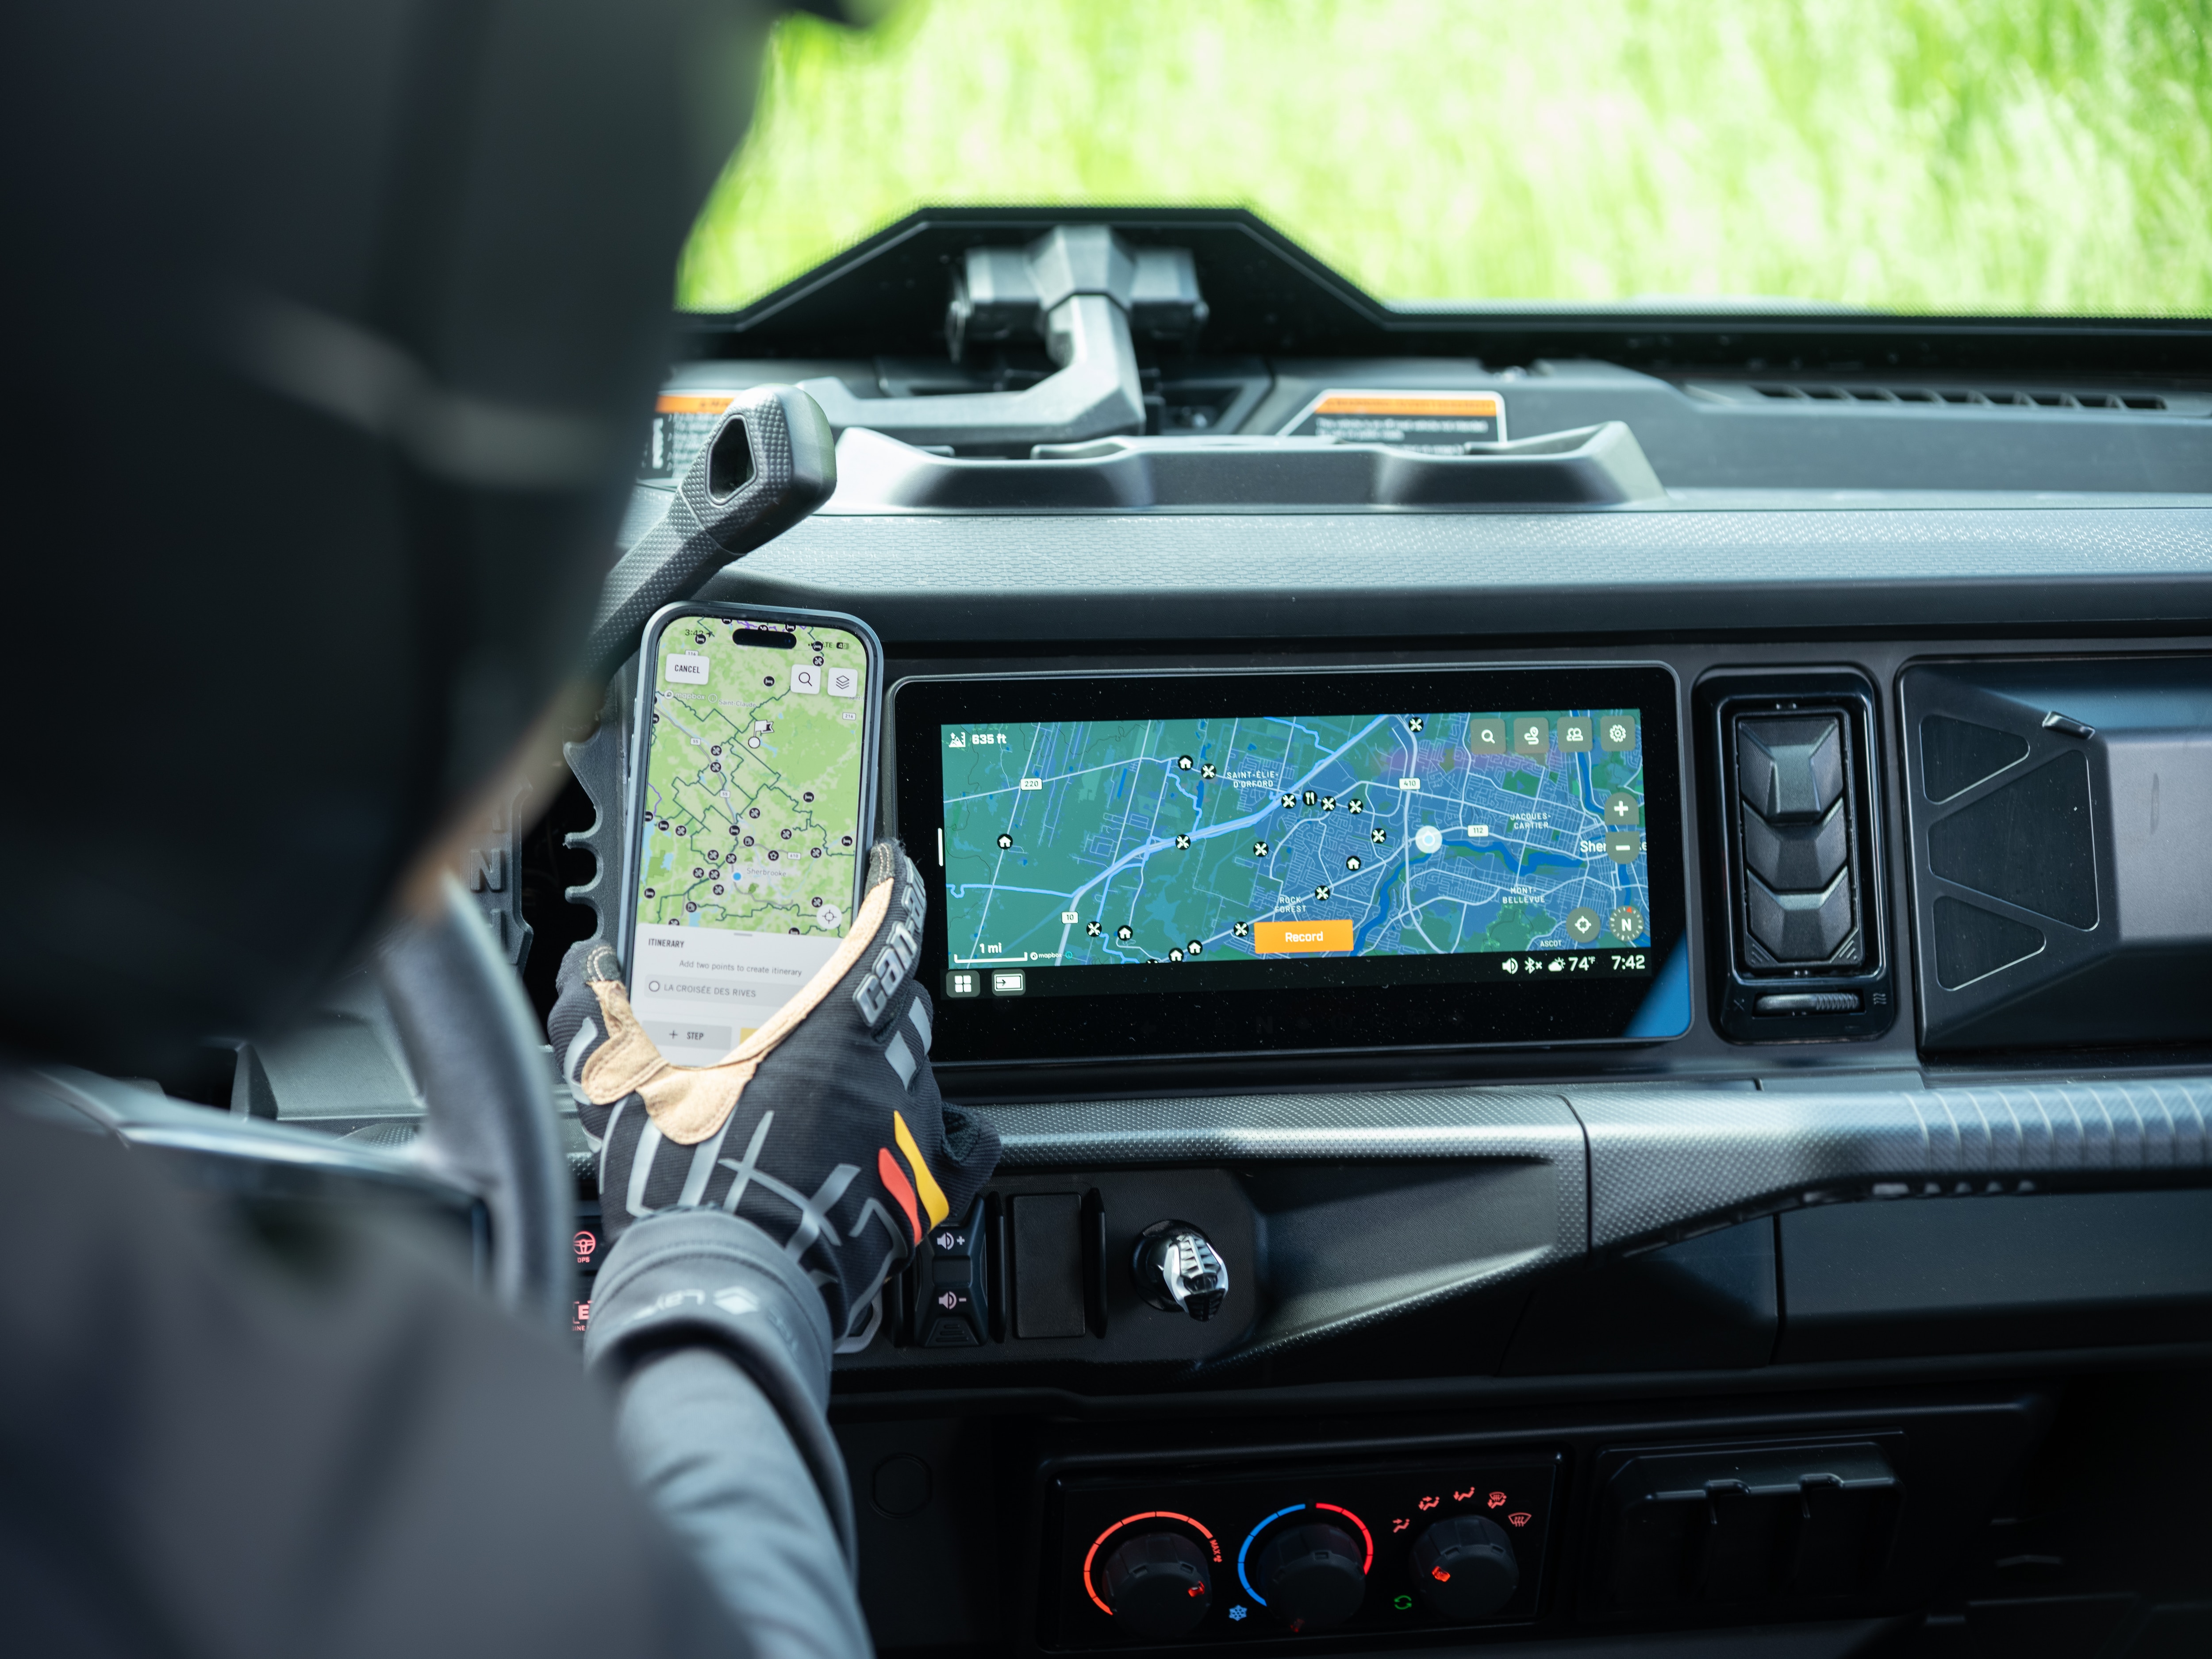
How to Use Navigation on the 10.25″ Wireless Touch Display

Compatible vehicles: 2027 Defender HD11 X mr, HD11 Limited & HD11 Lone Star CAB

When you open the Navigation app, you’ll see a pre-downloaded map that includes points of interest and official ORV trails in supported regions. This embedded experience offers multiple essential functionalities to help you get where you need to go.


Map Elements


Zoom In/Out

Quickly adjust your view to see the bigger picture or focus on the details, ensuring you always have the right level of visibility for your journey.
 

Scale & Altitude

See the current map scale as you zoom, along with your real-time elevation for added situational context.
 

Compass

Maintain your sense and tap the icon to lock/unlock a North Up view for consistent orientation wherever you go.
 

Map Settings

Customize your viewing experience with ease by switching between 2D and 3D map views to suit your preference.
 

Record a Ride

You can select the RECORD button at the bottom of the screen to record a ride. When you stop the recording, a summary with relevant ride stats can be accessed by:
 

1. Selecting the RIDES icon


2. Pressing COMPLETED RIDES
From here, you can also rename or delete a recorded ride by selecting it.
 

Points of Interest


Search for Points of Interest

1. Select the POINTS OF INTEREST icon to see a list of gas stations, restaurants, BRP dealerships, and more!


2. Press a specific point of interest and choose NAVIGATE TO to head directly to it.


Save a Custom Point of Interest

1. Push and hold anywhere on the map
2. Select SAVE
The point of interest can now be seen on the map and be found under My Places after selecting the POINTS OF INTEREST icon


Create or Join a Group


The Navigation app’s Group Ride feature allows for vehicle-to-vehicle location sharing without a phone connection or cellular network. It is designed for compatible BRP vehicles equipped with either the 10.25″ Wireless Touch Display (2027 and newer) or the 10.25″ Touch Display (2024 and newer with the GPS module with Group Ride installed), in supported regions. You can easily keep track of other vehicles directly on the map within a range of 1+ mile (1.6+ km). Group members are displayed with a uniquely colored icon, while other BRP vehicles appear as a black icon.

Note: Friends added to groups in the BRP GO! app are independent from groups joined/created on the vehicle display.


Activate the feature

1. Select the GROUPS icon


2. Press SHARE POSITION
3. Save your desired initials
 

Create a group

When the prompt appears to enter the group code:

1. Enter a 4-digit code of your choice
2. Press JOIN
3. Share the group code (4-digit code you entered) with your friends
 

Join a group

When the prompt appears to enter the group code:

1. Enter the group code shared with you
2. Press JOIN
 

Hide non-group members

If you’d like, you can filter your map to display only the vehicles you are in a group with.

1. Select the GROUPS icon
2. Toggle SEE GROUP MEMBERS ONLY to ON
 

Once you create or join a group, it remains saved in the display’s memory until you manually leave it, so you can seamlessly pick up where you left off.


Transfer Data Wirelessly from BRP GO!


Unlock an enhanced navigation experience by wirelessly transferring data from the BRP GO! app to your vehicle via Bluetooth. Easily send itineraries and custom points of interest to your display, and keep official ORV trails up to date on your map.


Transfer itineraries and custom POI

On your display:

1. Pair your phone to the display via Bluetooth
Settings > Connect > Bluetooth > Phone > Pair New Device


2. Open the Navigation app

On your phone:

3. Open the BRP GO! app and sign in or create an account
4. Go to: Navigation > Map Details > See Vehicle Trails
5. Press Download to access the list of regions available
6. Select the regions you want to receive official ORV trail and points of interest updates for


7. Press DOWNLOAD & TRANSFER
You should see an orange circle on your display indicating that Trails & Places are being synched. A green check mark will appear beside Sync Itineraries & My Places when the transfer is complete.


If you’ve already created an itinerary or custom point of interest in the BRP GO! app’s OFF-ROAD playground, it will transfer automatically. From now on, when your phone is connected to the display via Bluetooth and the app is open, new itineraries and points of interest will transfer automatically. Read on to learn how to create an itinerary and update official ORV trails.


Create an Itinerary


To create an itinerary in the BRP GO! app on your phone:

1. Go to the NAVIGATION tab
2. Press the RIDES icon on the top left (below the search bar)
3. Select CREATE ITINERARY
4. Drag the marker on the map to your desired starting point
- You can tap the Search icon to choose from an official POI or a custom POI
5. Press START HERE
6. Select +STEP to add another waypoint to the itinerary
- You can tap the Search icon to choose from an official POI or a custom POI
7. Press ADD TO ITINERARY
8. Repeat steps 5 & 6 above until your desired itinerary is created
9. Select NEXT
10. Tap the 3 dots on the top right if you'd like to rename the itinerary, share it, add it to a group, duplicate it, or delete it
11. Select the arrow on the top left to save the itinerary for later


After your itinerary has been transferred:

1. Open the Navigation app on your display
2. Select the RIDES icon
3. Press Itineraries
Tap an itinerary to start navigating to your destination with turn-by-turn directions on official ORV trails, directly on your display.


Update official ORV trails

1. Open the Navigation app on your display
2. Pair your phone to the display via Bluetooth and open the BRP GO! app (ensure you are signed in to your account)
In the BRP GO! app:
3. Select the OFF-ROAD playground from the Map Details (top right of Navigation tab)
4. Scroll down and press SEE VEHICLE TRAILS
5. Make sure the region(s) you want to update are listed under Off-Road
6. Choose CHECK UPDATE under TRANSFER TO VEHICLE